Congratulations! You’ve bought your first Airtame. Here’s the 11 key points to follow for the most effective Airtame installation

Congratulations! You’ve bought your first Airtame. Here’s the 11 key points to follow for the most effective Airtame installation
If you want a more detailed step-by-step article for Airtame installation, check out our help site.
Already set up and ready to go wireless? Download the Airtame app directly from your computer.
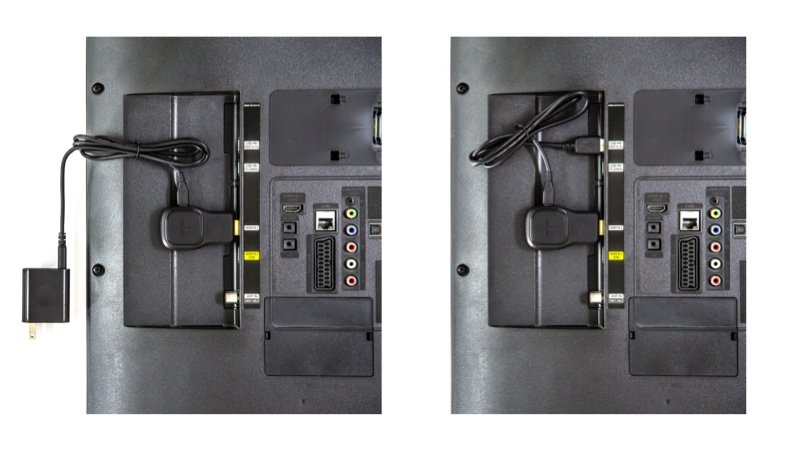
Plug Airtame into the HDMI port on your TV or projector. Use an adaptor if there’s no HDMI input. Use the included AC adaptor to ensure Airtame has power or alternatively power Airtame through the TV via the micro-USB to USB cable. You will only be able to set up Airtame through a computer, as you need access to the Device Management Panel.

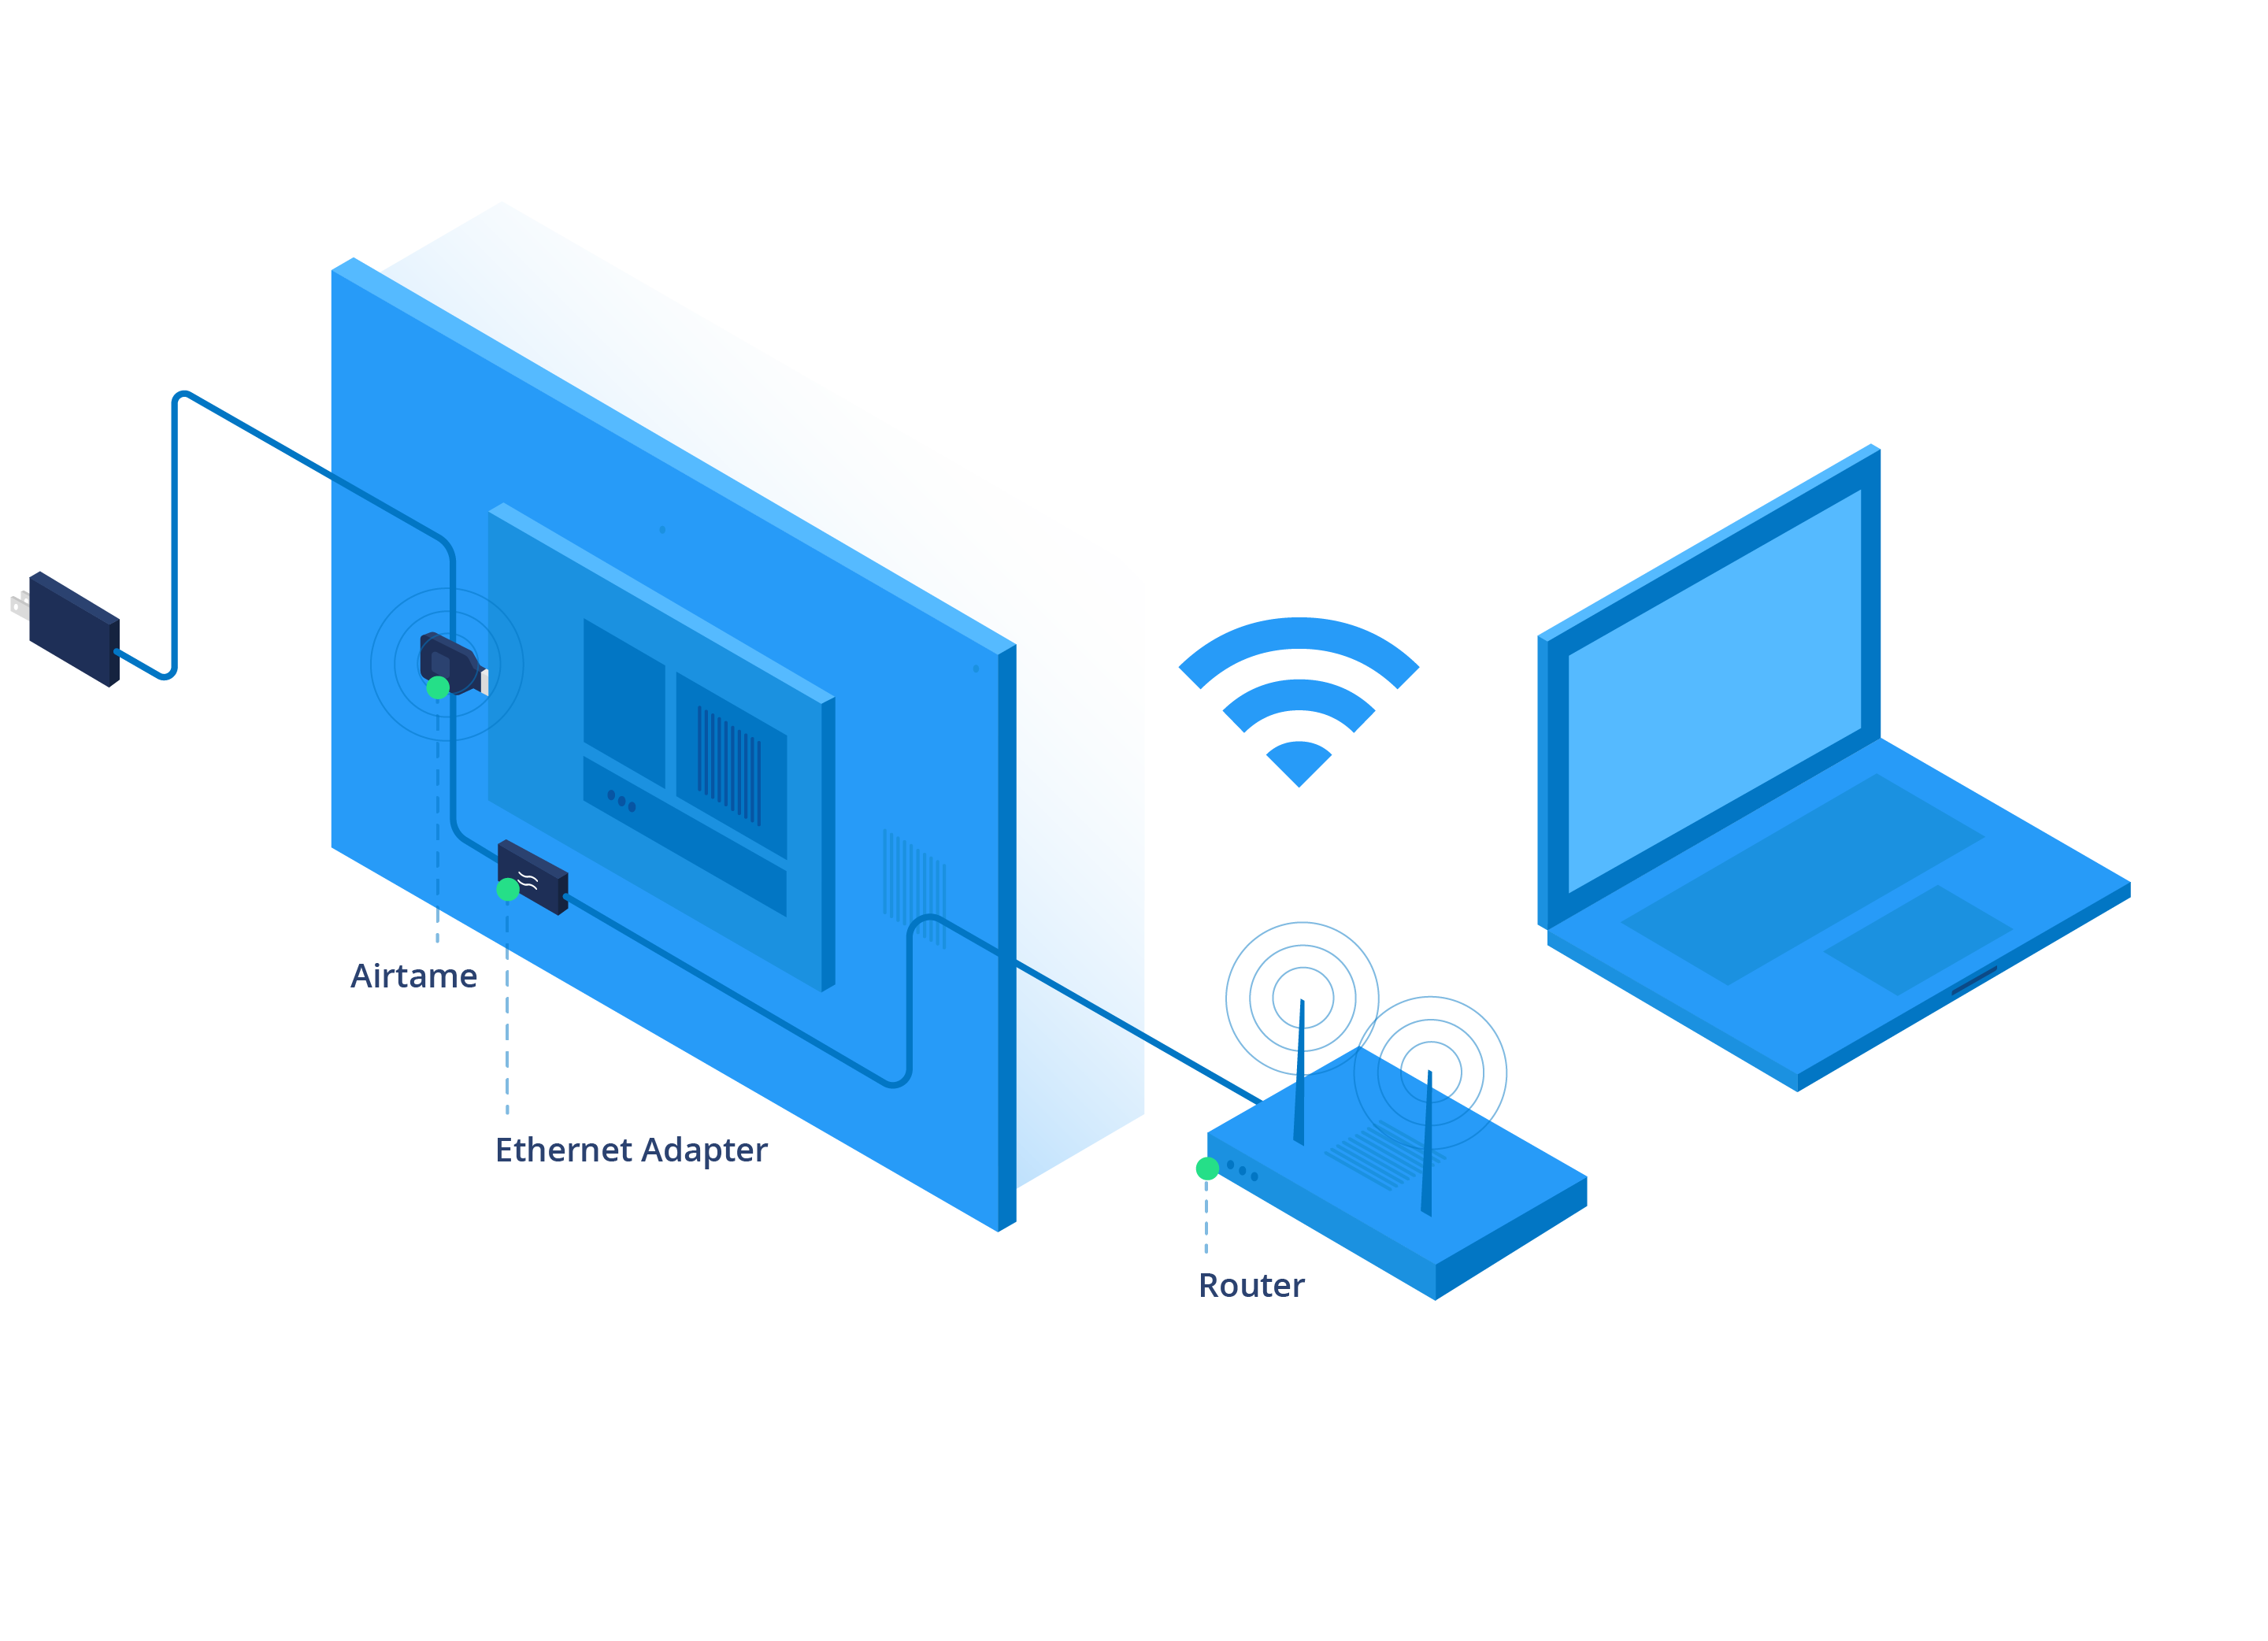
If your WiFi signal is blocked, your streaming performance may be inhibited. Make sure that the AIrtame is placed as close to the edge of the TV as possible and preferably pointed towards the nearest access point. The distance from the access point to Airtame should be no more than 10 meters/32 feet, and with no WiFi blockers in between.
Airtame relies on a good connection to stream without interruptions. We recommend using an Ethernet connection between Airtame and the network for optimal performance and minimal delay.
Many of the obstacles found with WiFi are not adherent with Ethernet. If you’re using a WiFi connection, however, make sure to limit the number of obstacles in between Airtame and the network, as described above. Remember that walls, other access points and physical objects will impair the connection.

Before setting up Airtame, we suggest to map out where your access points are and how your Airtame will be set up in relation to them. If you’re unsure whether your WiFi signal is strong enough to carry a good connection with Airtame, use a signal strength app or go to Airtame Cloud to check it.
We’ve made installing your Airtame as easy possible. Once you have plugged in the device via the HDMI port, select the correct HDMI input on your TV or projector. You’ll be presented with a welcome screen, and asked to visit airtame.com/setup to download the Airtame app to your laptop or computer.
Once the app is installed and launched, just follow the simple set-up instructions: name your Airtame, and connecting it to your preferred network.
Go to https://airtame.cloud and set up a fee Airtame Cloud account. Add the Airtames in your organization It’s your cloud management tool where you can manage and monitor all of your devices.
In addition, you’ll be able to select the content shown on screens when no one is streaming to Airtame. Create groups of devices and set permissions in the Cloud, perform reboots or update chosen devices. In the cloud, you’ll see Homescreen. That’s your screens when Airtame is idle.
With the newest firmware update, you’re also able to customize Homescreen to show images, websites, custom backgrounds or app integrations. Currently, we offer these four app integrations for Homescreen: Trello, Unsplash, World Clock and Google Slides. They’re perfect for digital signage purposes, something we believe every business can benefit from exploring and utilizing.
Invite other users by clicking on “Invite user” in the upper right corner of the Cloud and entering their email. In the overview of users, your coworkers will now show up.
You can set-up your colleagues as any of the three user roles: Administrator, Manager and User, each featuring different levels of maturity and access to the Cloud. If you need to remove a user, you can do so by going to the “Team” tab and removing the person.
Mass deployment to more than one computer is also possible. For Windows users, download a mass deployment installer here to pre-configure and install on many PCs.
For Mac OS, use a third party deployment service along with the existing .dmg file along with Soundflower for audio capturing. The Soundflower driver is included in the .dmg package, but for mass deployment you need to install it separately.
Here’s some more general points about mass Airtame installation and deployment in business environments, and here for schools.
Pre-set image settings on most TVs and projectors work best with watching satellite TV. To improve image quality when streaming, you can calibrate your screen to best fit Airtame. Adjust screen settings by opening a blank spreadsheet document for color reference.
Find standard mode or reset adjustments on your screen and reduce contrast (often around 70-80% of max value) until all lines in the spreadsheet are visible. Reduce sharpen until the text is easy to read (often 0-20% of max value). See more tips on how to adjust display settings here.
If a problem should occur either with the connection, updates or other, we recommend first checking the source of the problem. If you have no connection, check your WiFi signal. With update issues, you should look at your firewall restrictions.
We also have a help center with many useful articles on troubleshooting and getting the most out of Airtame. If you aren’t able to fix the issue yourself, we’re always ready to assist you. Go to our website and chat directly with one of our competent Customer Success team members by clicking the chat icon in the bottom right corner.
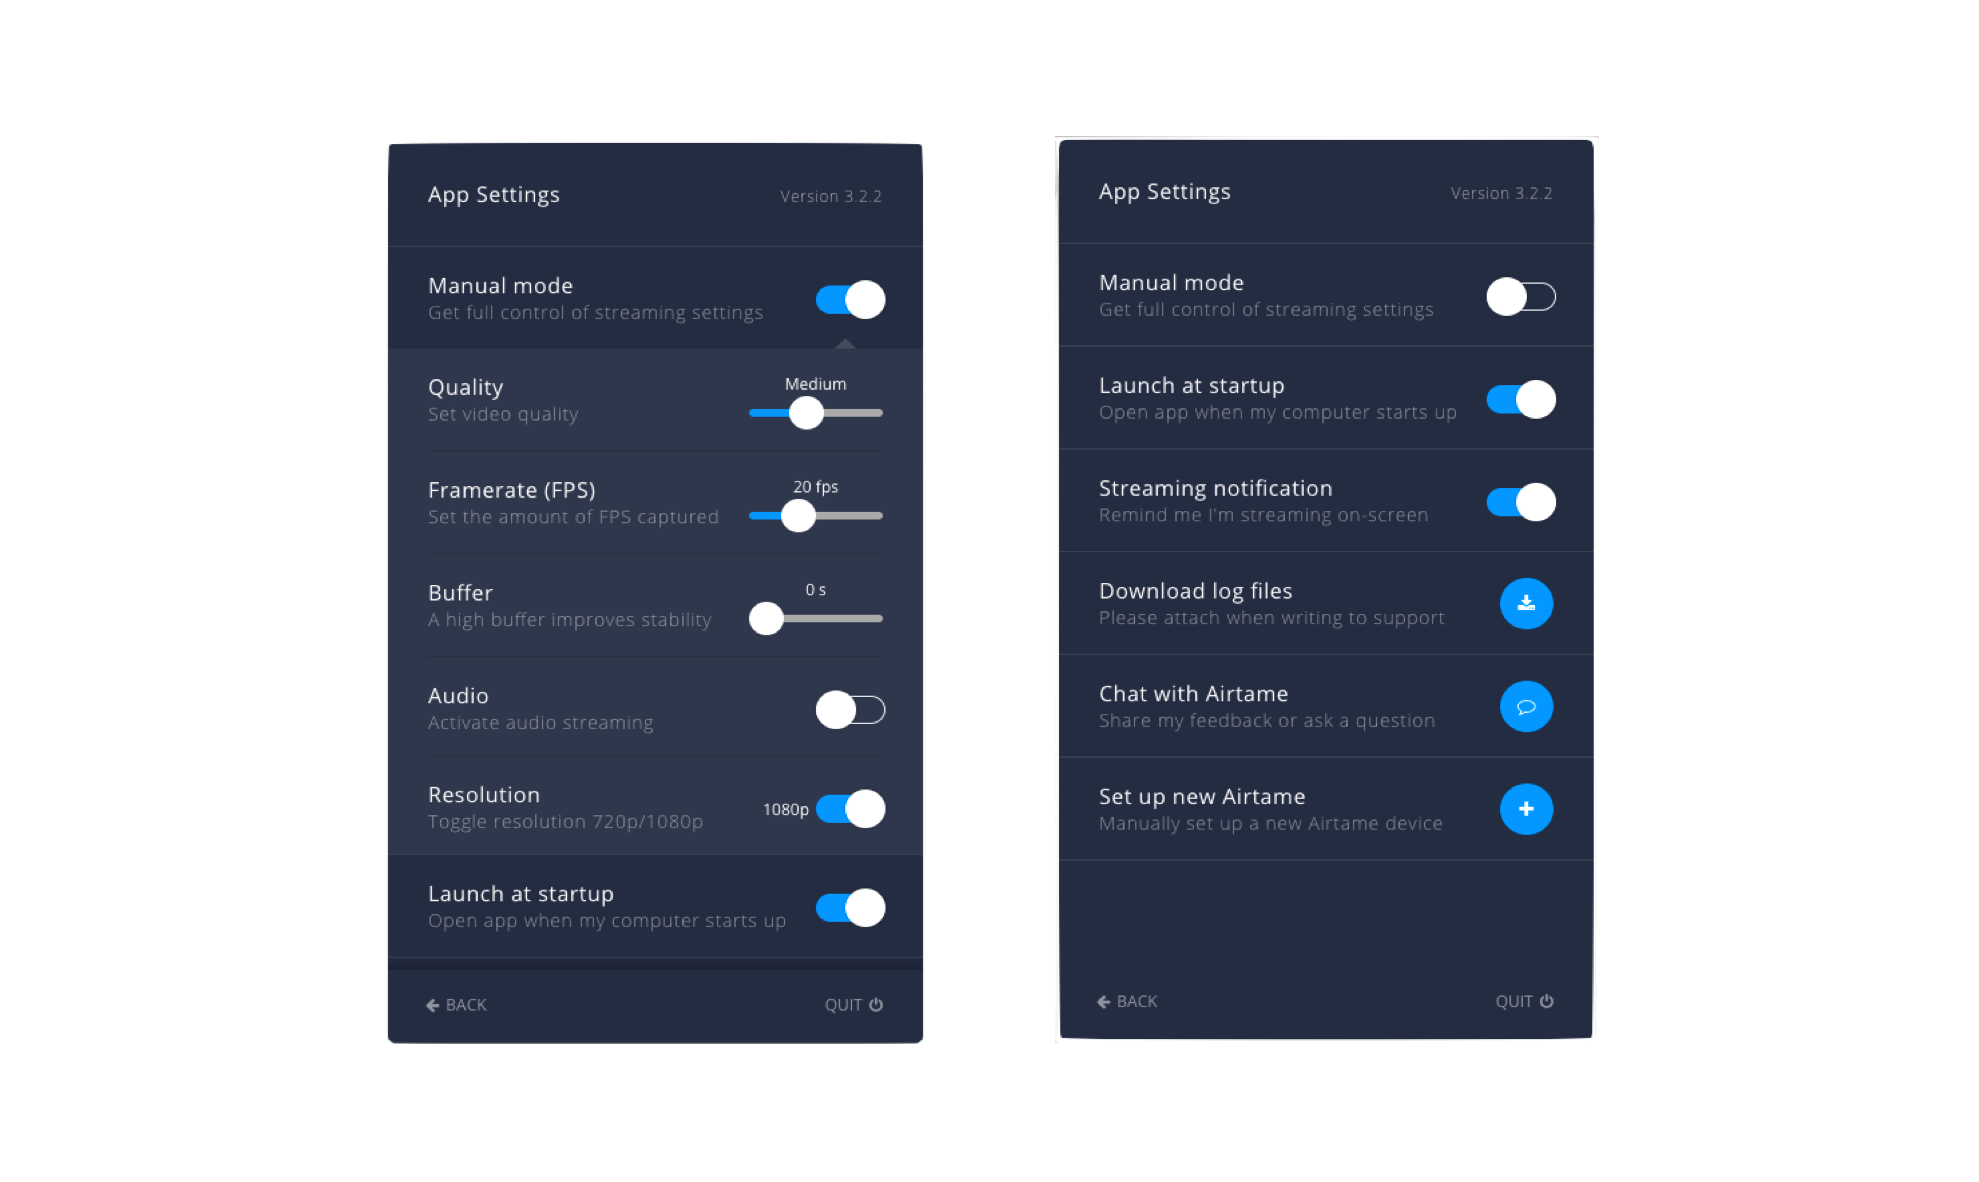
There are many ways you can personalizing Airtame for your workplace. Beyond the digital signage options outlined above, you can find the many settings for your device(s) in the Airtame app, such as framerate (Frames Per Second) and buffer time. You can even download your log files if you need to troubleshoot, and contact us directly via the chat functionality.

Click the sound button in the Airtame app to enable audio. Audio is disabled by default to minimize latency, but with a stable connection, you can stream both audio and video with sound.
Creating guest networks within your internal networks is not only smart for security purposes, it’s great for organizations with a steady flow of guests too. We also offer a Windows Guest app for one-time users so they don’t have to install the regular app.
We’ve created a list of network configurations and requirements to accommodate internal and guest users. See more recommendations for Airtame and guests here.