Presentations can be tough. We’re here to help. Gain expertise with these 10 essential Google Slides tips

Presentations can be tough. We’re here to help. Gain expertise with these 10 essential Google Slides tips
PowerPoint may be the most popular presentation software out there, but not everyone can afford to pay for it. This is why many people consider Google Slides as one of the best alternatives to PowerPoint. It’s free, easy to use, and easily accessible. All you need is a Google account and Internet access, and you’re ready to roll!
So, how do you actually make the most of Google Slides and get your presentation looking top notch?
Well today we’ve reached out to our friends over at 24Slides for some Google Slides tips. As leading experts in custom presentation design, they know a thing (or ten) about how to make any slideshow more impactful, and your audience hooked.
So, here are ten quick Google Slides tips from 24Slides that will help make presentation wow your audience.
More of a Microsoft fan? Check out our pro-PowerPoint tips, or get some general presentation pointers here.
Google Image Search has billions of images indexed. When you use Google Slides, you don’t need to download images and then upload them again to your slide. Nope, you don’t even need to leave your browser tab to look for suitable images for your presentation.
All you have to do is click on Insert > Image. Then select ‘Search the web’ from the dropdown list. The side panel ‘Search for Google Images’ will appear on the right side of your screen (see screenshot below):
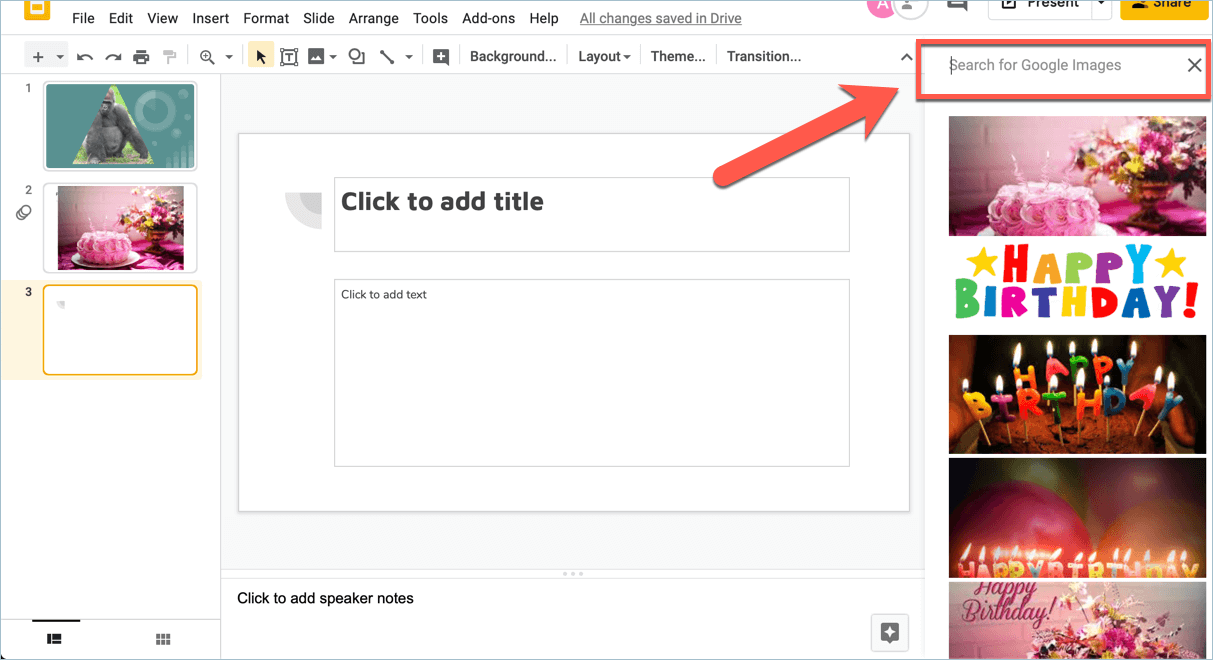
Simply type in the keyword(s) for your image and the results will appear below the search box. The last step would be for you to click on the photo(s) you want to use in your slide. And that’s it! The entire process will only take you anywhere from a few seconds to a few minutes!
You can do this by clicking on any slide thumbnail on the left side panel. You’ll then see these options in the menu bar:

Click on Theme to access the Themes side panel. You will see something like this on your screen:
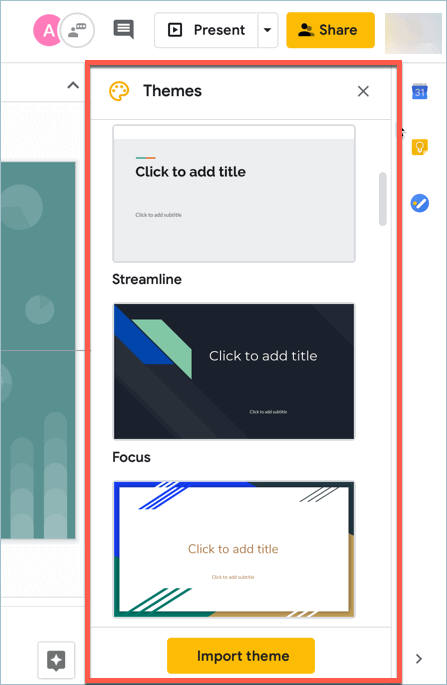
Note that there’s no preview button. You simply need to click on the Theme you like and the changes will be applied in real time. Also, if you want to import a theme from an existing presentation, you can click on the yellow Import Theme button. Play around with the different theme options until you find one that works best for your presentation!
Your photos need not be in the usual rectangular or square shape all the time. With Google Slides, you can change your image into various shapes, arrows, callouts, or equations. Here’s how:


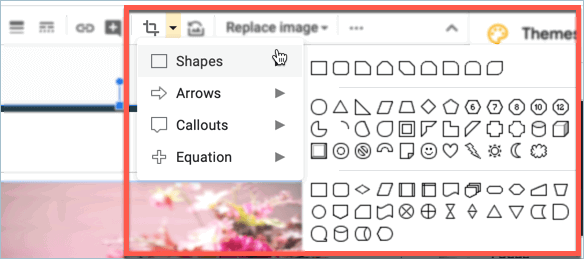

Feel free to experiment and explore the many different options. Remember, you can always undo your changes on Google Slides.
To insert a diagram on your slides, click on Insert > Diagram. The Diagrams side panel will appear on the right side of your screen. As you can see below, you can choose from 6 different types of diagrams: Grid, Hierarchy, Timeline, Process, Relationship and Cycle diagrams.
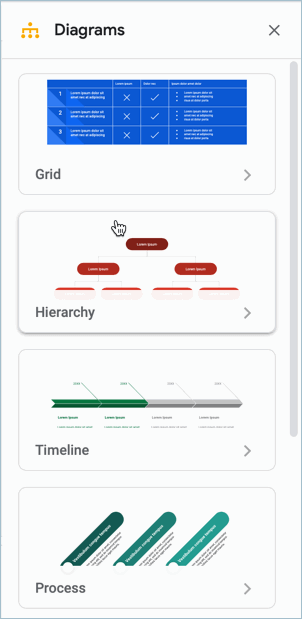
For this example, I clicked on the box for Timeline diagram. In the screenshot below, you’ll notice that I was able to customize my Timeline diagram. I changed the number of timeline dates from 4 to 6; I was also able to change the timeline’s color to green.
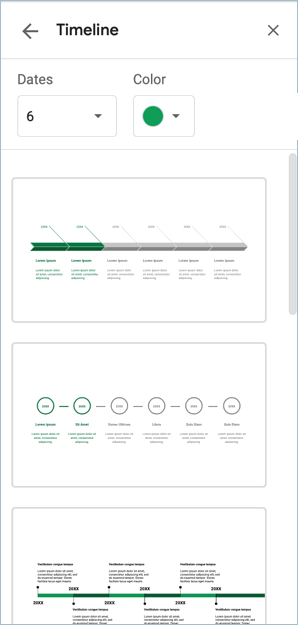
Play around with the different options until you find the perfect diagram(s) for your presentation.
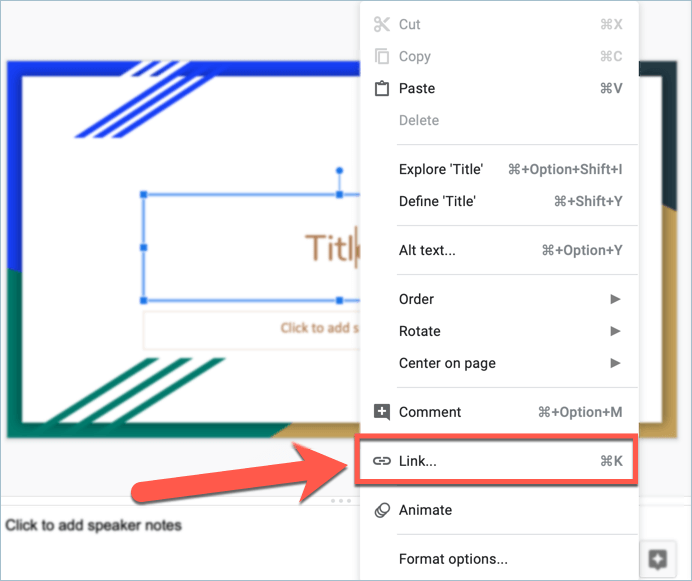
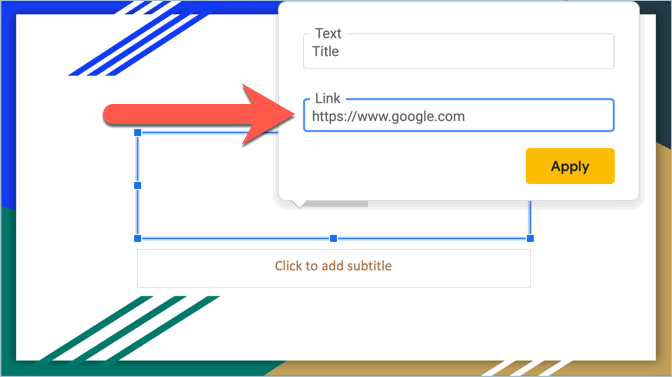
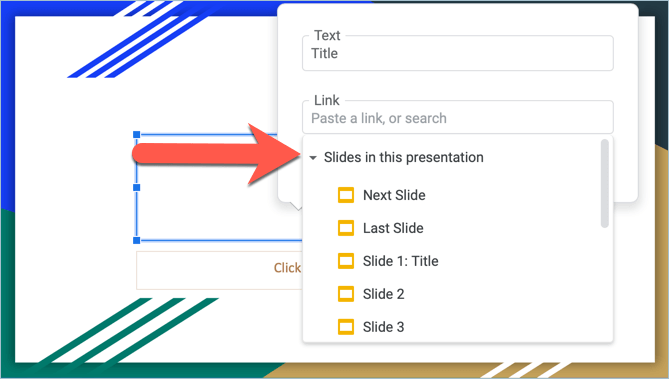
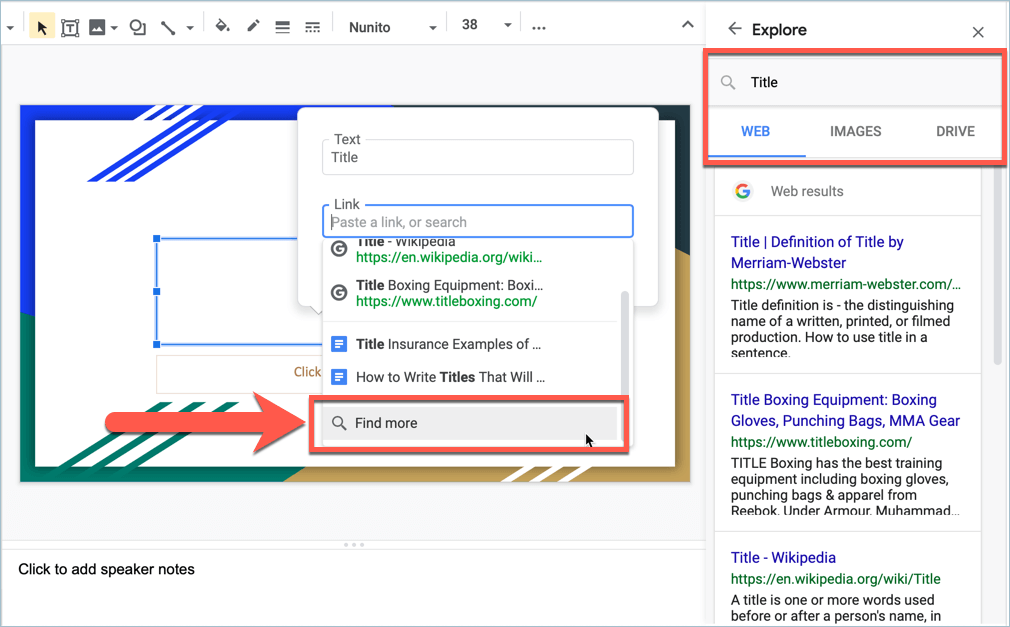
With Google Slides, you’re not limited to adding just links to websites, you can also link to images, your files on Google Drive, and even to other slides in your presentation!
Here’s what you need to do:
If you’re only working with a few slides, then you may not have much need for a slide master. However, once you get to double figures (say from 10 slides onwards), then you’ll see just how much of a timesaver a slide master is. You don’t need to edit each individual slide, instead you can just go directly to the slide master and all slides in your presentation will automatically be updated.
To edit your slide master, simply go to Slide > Edit Master. This is how it looks like:
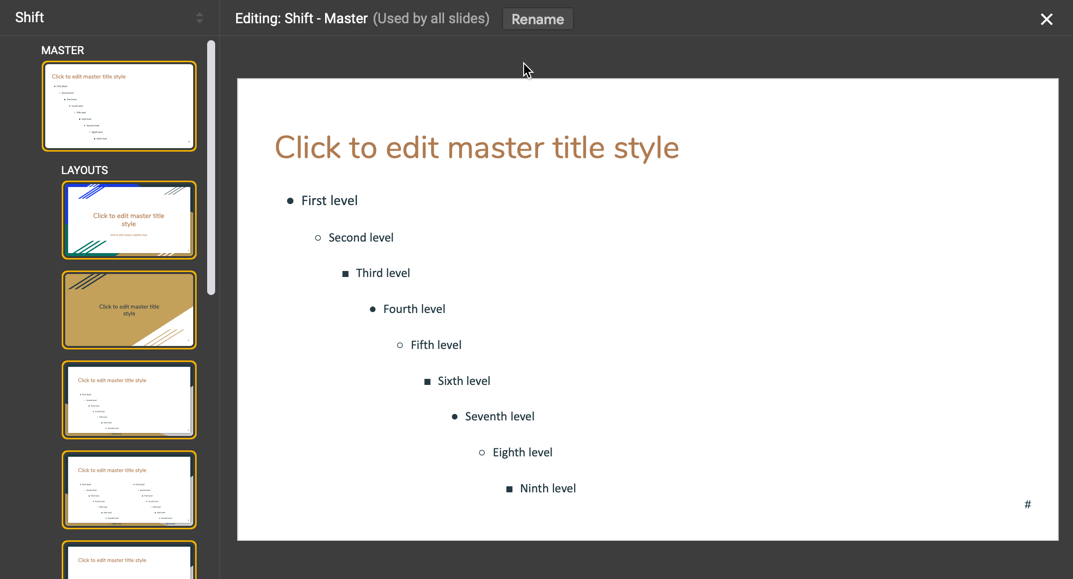
Click on the elements you want to change. For example, if you want all titles and subtitles to use Monserrat font, then you can change that here. There’s a lot of things you can do with the master slide. You can add your company logo in the footer section or the header, and it will automatically appear on all your slides.
The main thing to remember is if you want something to appear on all your slides, the best way to go about this is by editing the slide master itself.
One of the best ways to make your presentation come alive is by adding videos to it. To do so, click on Insert > Video and you’ll see this on your screen:
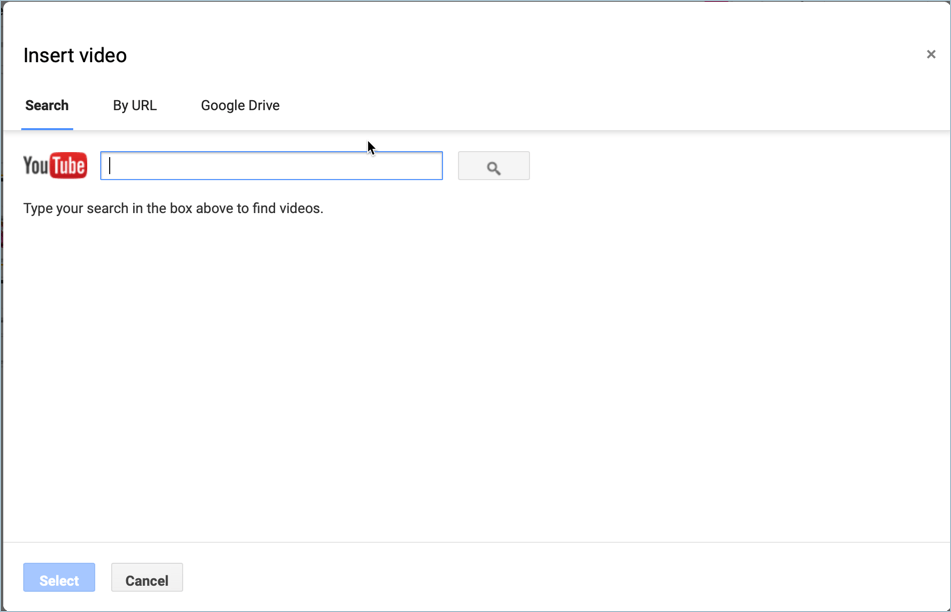
As you can see, you can search YouTube videos directly from your slides (no need to open up another tab and type YouTube). You can also add a direct link (URL) to a video online, or you can search for videos stored in your Google Drive account.
To edit and format your video, click on the video itself so the Format options button will appear on the menu bar. Click on this button and the Format options side panel will appear on your screen.
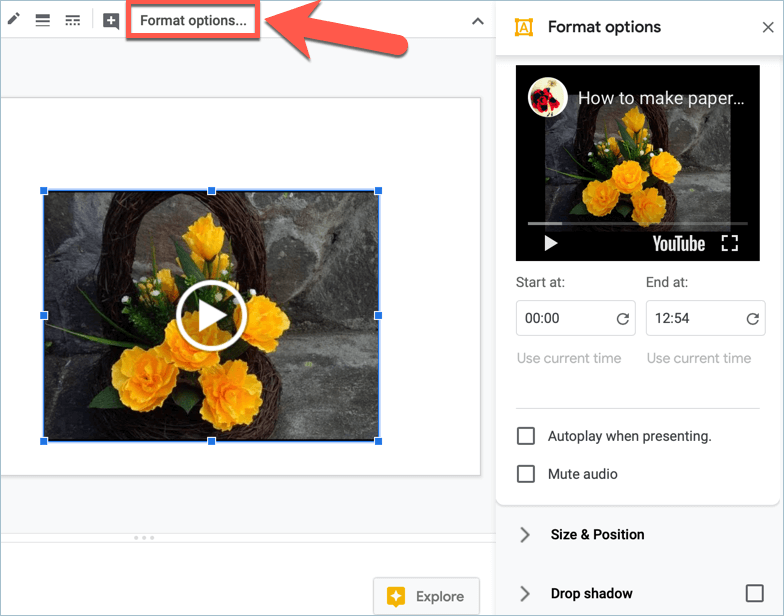
Feel free to adjust the video playback options, size and position, and drop shadow settings.
Google Slides transitions are easy to set. To add them, you’ll need to click on the slide thumbnails so you can see the hidden Transition button on the menu.
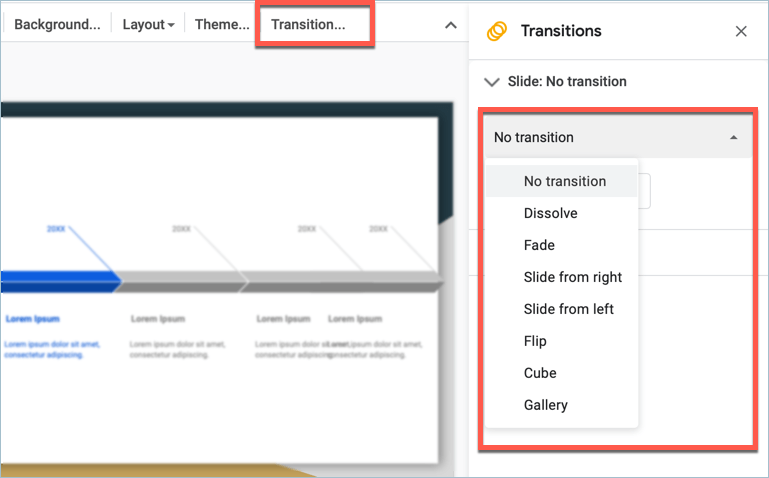
As you can see in the screenshot above, there aren’t a ton of options on Google Slides (unlike PowerPoint). It’s not necessarily a bad thing though. Most experts recommend keeping transitions to a minimum because it can distract the audience and can even cause motion sickness in some cases.
So, take your pick from the 7 transition options and focus on making your message heard loud and clear. For best results, I recommend you use the same transition effect throughout your presentation.
An interactive presentation is bound to get more attention than, say, a one-sided one. Since Google Slides is cloud-based, it’s easier to get your audience to interact and ask you questions in real time. Here’s how:
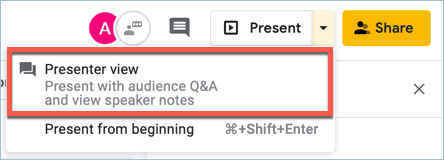
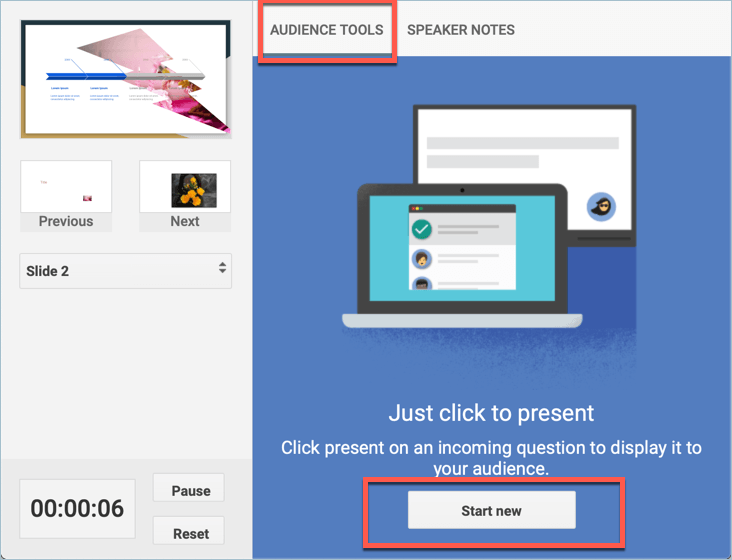
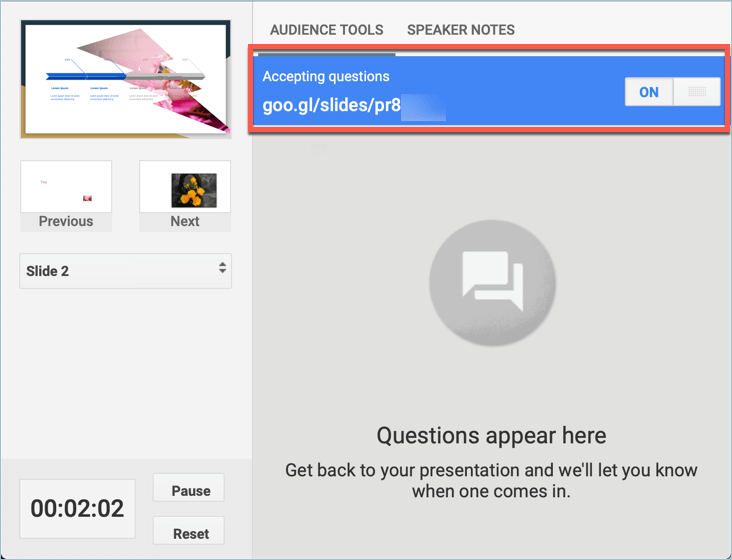
The really cool thing about this feature is you can use it whether you’re in the same room as your audience or they’re halfway across the globe!
Google products stand out with their top-notch online collaboration features. Google Slides is no different. If you’re working with a team of designers and content makers, then the yellow Share button is your friend.
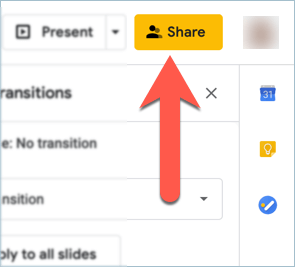
Once you click on Share, you’ll see this pop up on your screen:
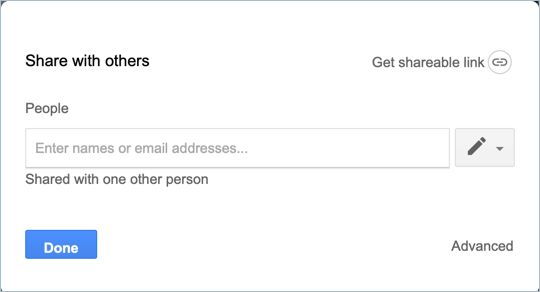
You can either get a shareable link and send it to people via email or chat. Or you can type in people’s name and/or email addresses, then hit the blue Done button to send out your invite. Now, you’ll have an extra pair of eyes to look over your presentation and make sure it’s the best it can possibly be!
If you’re looking to wow with your presentation, you are probably using a lot of visuals. This means adding in a lot of JPEGs, videos perhaps even the occasional PDF. These files can be heavy, and quickly stack up, which runs the risk of your Google Slides presentation lagging and testing the patience of your audience.
But, there’s another way. If you have a designer at hand, open up Adobe Illustrator and give vector graphics a try. Creating something unique, custom and exporting as a PNG is likely to keep your slides looking stylish and functioning effectively.
Huge thanks to Guillaume Proux, co-founder of Oomnis Limited for the bonus pro tip!
Did we miss any pro-Google Slides tips? Let us know your favorite!
It’s really no wonder why Google Slides is touted as the best PowerPoint alternative by many experts in the presentation industry. It’s user-friendly, it’s highly customizable, it’s cloud-based, and it’s free.
On the other hand, if you’re pressed for time or simply want to focus on more important things, you can leave the design work to 24Slides. It costs as little as $7 per slide for a custom design and we can turnaround presentations in 24 hours.
Even better, we’re offering Airtame customers and readers a 20% discount off their first order. Simply visit 24slides.com and use the coupon code AIRTAME at checkout.
If you would like to know how to present from your mobile or computer devices to your TV screen or projector wirelessly, watch this short video: